As taught by Beryl Davenport
I created this document in May 2009 to capture my experience while on an art holiday in Blackpool. I didn’t take any notes at the time, I just bashed this article down when I returned home. All I had were the paintings that I’d done plus an understanding of what I’d been taught. The tutor was Beryl Davenport who must be the worlds greatest Acrylics enthusiast. So credit to Beryl …….. And forgive any grammar and spelling mistakes…… They are all mine.
© Dave Hendry 2011
Acrylic paint can be used undiluted straight from the tube or water may be added in various amounts to give a range of effects. The images below show different dilutions of red acrylic paint
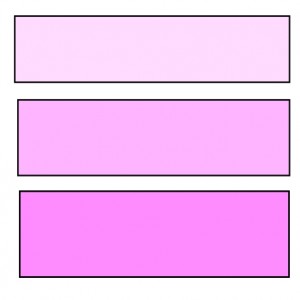 Watercolour mode – the examples here illustrate just 3 of the possible mixes of red that could be made in the watercolour mode. These are mixed using lots of water and just a speck of acrylic paint. The resultant mixes will act in a similar manner to traditional watercolour. Brushes will not quickly come to harm while using this mix
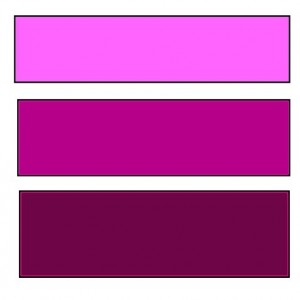 Acrylic mode – the examples here illustrate just 3 of the possible mixes of red that could be made in the acrylic mode. These are mixed using varying amounts of water and a larger amount of acrylic paint. The resultant mixes will act in a manner peculiar to Acrylics i.e. workable but quick drying. Brushes with this mix on must be submerged in water if they are out of use for even the shortest time.
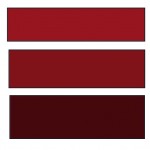 Oil mode – the examples here illustrate just 3 of the possible mixes of red that could be made in the oil mode. These are mixed using small amounts/no water at all. Their most concentrated being straight from the tube. The resultant mixes will act in a similar manner to traditional oils. Easy application may be helped by using washing up liquid. Brushes with this mix on must be submerged in water if they are out of use for even the shortest time.
The different “modes” of Acrylic paint are suggested by using a chart as above. The panels show different mixes of the same colour, some with a lot of water, some with less and some with almost none or straight from the tube.
It’s interesting that quite a few artist and tutors shy away from using Acrylics in anything other than the thickest consistency (ie “Oil Mode”).
Perhaps each individual can have a try at the exercises in this document and decide for themselves where, or if, they apply for them. Note that a lot of these exercises were completed quite quickly.
Acrylic in “Watercolour Mode”
Beryl Davenport summarised her steps to creating a painting employing acrylic paint in what she referred to as “watercolour mode” (see below for an example) thus:-
1. Draw the shape
2. Lay clear water wash on the shape and let it soak for at least 2 minutes
3. Use this time to mix up paint (these may be in watercolour mode or acrylic mode)
4. Re-assess paper surface – take off any excess that is sitting on top (place a tissue alongside the shape – excess will run into tissue – do NOT dab inside the shape)
5. Drop in the first mix (watercolour mode – just touch the paper with the brush – the water will disperse the paint)
6. Tilt and turn the paper to cover the shape with wash.
7. Drop in second wash (acrylic mode) in shadow areas
8. Tilt and turn to obtain desired form.
9. Continue to tilt and turn at intervals until paint has dried.
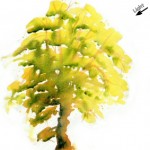
This tree was painted using acrylic paint in watercolour mode i.e. lots of water and a speck of paint. Follow the method, as described on above, of applying water, waiting for it to soak in etc. A useful suggestion is to add a pencilled note to the paper showing where the light source is so that it was always kept in mind and didn’t swap from side to side resulting in a poor finished painting. This is a good idea whatever painting medium is used.
After painting the brown trunk and branches, lay down the first yellowish green and after “tilting and turning” add a greener paint then shadow colours. Note that the shadow colour is quite dark, particularly on the left and near the bottom of the tree (i.e. opposite the light source)
The painting should be completed in about 5 minutes
Acrylic in combination “Watercolour & Acrylic Modes”
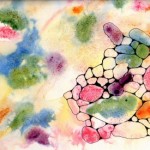
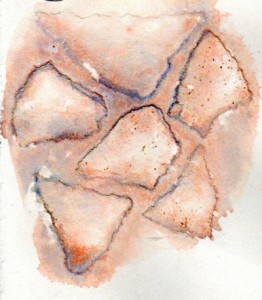
Our first foray into exploring different modes of Acrylic was to create a random painting that would eventually become a pebble scene. We put 6 lots of paint onto our palette, 3 primary colours (i.e. red, blue and yellow) which were mixed into a “watercolour mode” and 3 secondary colours (orange, green and purple) which were mixed into an “acrylic mode” Note that there is no real reason for any particular colour to be any particular “mode”, it was just used as a way of remembering which colour was which mode. The exercise would have been just as valid if the colour modes had been reversed. The reason for the different modes was to give certain “flowing” characteristics. Had all the paint been just watercolour mode then they may very well have just mixed with each other to create other secondary or tertiary colours. The presence of acrylic mode ensured a more pleasing result.
The exercise was carried out using “watercolour mode” guide as shown above as well as of being mindful of colour theory. We therefore dropped paint into the wet paper remembering to put harmonious or complimentary colours next to existing colours
When it had dried we picked out likely candidates for pebbles which were then outlined in black pen. We also added the shape of (in this case) a shell, although some may have added other things such as a starfish more than one shell etc. Then some people added salt (ideally to the wetter areas of the painting) to give an interesting texture. We were shown how some pebbles might have lines drawn on them or have rings around them. We were also instructed to remember that pebbles generally have rounded edges due to the way they are formed.
Although the painting above was far from finished it gives at least an idea of the process – this one was my attempt – there were many that were better.
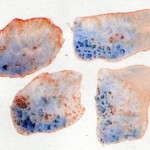
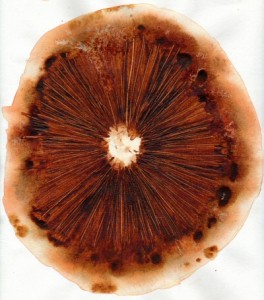 Another example of this mixed mode painting was the picture of the underside of a mushroom. This focused more on what effects can be created in the paint when it is in the “acrylic mode”.
We drew a large (possibly as big as 12 inches) rough circular shape with another “circle” inside that that would represent the mushroom cap edge. Then, following the guide to the “watercolour mode” , we added a pale brown wash into which we added a darker brown wash. After we had done the requisite “turning and tilting” and judged that we had developed the desired mottled and patchy effect, we carried on to the next stage. We now removed the water from inside the inner circle keeping the area between the two circles wet. It was impressed on us the important need to keep the rim (i.e. that bit of the painting that was to be lighter than the dark, veined centre) wet at all times. This was important because the paint at the next stage was going to meet that wet edge and flow.
We then added a dark brown “acrylic mode” mix that was made by starting with yellow and adding red until “you can’t get it any redder” then finally adding specks of blue until the brown mix was satisfactory. The paint was added using radial strokes from the middle out until it touched the wet paint at the inner circle. This was repeated until the full circle had been covered and then the centre was dabbed out using a tissue. My painting (shown above) was not correctly “dabbed” and consequently doesn’t give a convincing light circle that is meant to be the stem.
After the darker paint had started to just thicken up as it was drying, a cocktail stick was used to create the gills of the mushroom. This was done in a particular way. First, 4 strokes were created at the cardinal points (i.e. north, south, east & west) thereby making 4 quarters, then each quarter was divided in two and each of those were divided in two etc until the complete circle had been completed. Doing it this way ensures that the lines go from the centre straight out and don’t gradually develop an unintended slant as might happen if you started, say, at 12 o’clock and worked your way round.
It was also suggested that the cocktail stick be drawn from the centre outwards and lifted with a flourish quite quickly so the marks didn’t end up looking a bit deliberate and artificial. It wouldn’t be hard to imagine other things that could be painted in this way, for example oranges or even a close up of eyes.
I have included this example simply because I had it available – this one was my attempt – there were many that were better but I was quite pleased with it.
Textures for Stone Walls
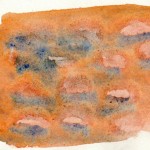
This method used partial wet-in wet – basic shapes were painted in a background colour (in “watercolour mode”) and then a shadow colour (in acrylic mode) was dropped in “wet in wet” The space between the stones could be filled in while the stones were still slightly damp to give a soft edge.
This used completely wet-in-wet – a wash of “watercolour mode” acrylic was laid down and the thumb or finger used to “lift out” stone shapes. Then a shadow colour (in acrylic mode) was dropped in “wet-in-wet”.
This used completely wet-in-wet and collage – random shapes were ripped out of scrap paper and glued to the painting in “stone wall fashion” a wash of “watercolour mode” acrylic was laid down over the stone shapes. Then a shadow colour (in acrylic mode) was dropped in “wet-in-wet”. This colour was drawn under the collage pieces by capillary action giving a distinctive shadow and 3D effect
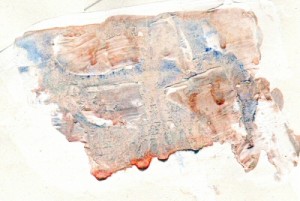 This used completely wet-in-wet and texture paint – a medium similar in consistency to toothpaste was applied to the painting using a palette knife and a texture was created in it. After it had dried, a wash of “watercolour mode” acrylic was laid down over the stone shapes. Then a shadow colour (in acrylic mode) was dropped in “wet-in-wet”.
“Paint Pulling”
The tutor showed us a technique that she referred to as “paint pulling”. The process started by mixing the paint into a consistency that could be thought of as being of custard thickness….. It was within the “acrylic mode” range. The way to test it was to spread a band of the mix across the paper and then strike a palette knife through it. If the stroke kept it’s width (i.e. did not start to “bleed” back into itself) then the mix was acceptable.
These two strokes of paint start to illustrate the finer points of the consistency required to start “paint pulling”. The one on the left is almost at the correct mix but observation at the time revealed that the paint was trying to refill the stroke…… i.e. wash back or bleed back into it. The stroke on the right was made after mixing in a little more acrylic paint so that the stroke maintained it’s width and form. We were now ready to create various plants and flowers.
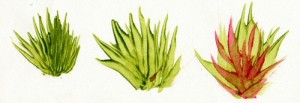
These three plants show examples of what can be created. The process starts by applying a few dabs of the mix onto the paper and then by striking up and away from the paint using a palette knife (we were very successful with very cheap plastic ones) you can the create spiky plants shown here. The example on the right was made by adding a red mix at the 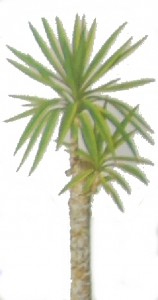 base of the initial green plants then repeating the knife process.
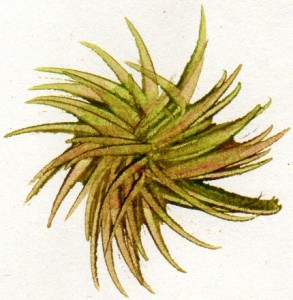
These plants are typical of Sansevieria (mother-in-laws tongue), Aloe Vera and Dracaenas. A lot of Dracaenas sit on top of a trunk like stem and are created in the same way but with the addition of a brown based stem. The addition of different colours allows for the creation of tropical flowers (after the addition of a green stem) see example on next page
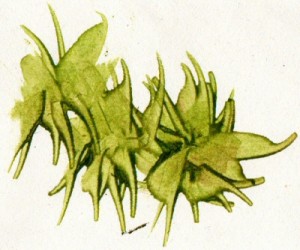
This is another example of “paint pulling”. A larger knife was used first and then I went in again with a smaller knife resulting in this succulent like plant.
This is a “spider plant” created in the same way as the preceding plants.
 If tendrils were painted that
 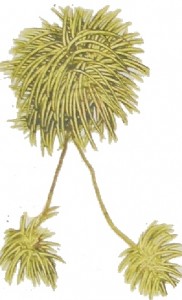 hung down vertically then smaller versions of this plant could be added to the ends. This would result in the realistic spider plant image that most people are familiar with. In this example a slight reddish tinted mix was added to give highlights.
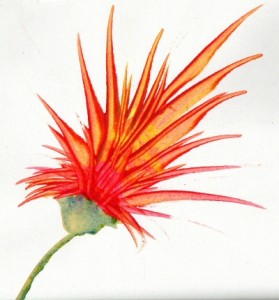
This exotic plant was painted using “acrylic mode” in the exact way described on previous pages with the addition of a stem painted in “watercolour mode” Note the addition of a blue tinted wash into the stem. This was done “wet-in-wet” and the paper tilted and turned to give the desired shadow effect. The flower part was formed by first using a larger palette knife and bold, sweeping, confident strokes then a further red mix was added into the flower and a smaller knife used to give finer detail. The whole thing took about 3 or 4 minutes to paint.
Fences, Walls & Weave
We were shown a variety of ways of producing fencing, basket weave and brick effects employing a piece of stiff card or mount board. The strips were about 15 – 20 mm wide by about 50 mm long but this could be altered to suit the desired effect to be created. The paint was mixed into the “acrylic mode”. Different effect would be created if, for example, an old credit card were cut into strips and used for a similar purpose. Differences also happen depending on how hard the card was pressed into the paint mix.
In this example Brown paint was mixed and loosely brushed across the paper. The card was then wiped quickly and firmly through the paint. The complete process from brushing on the paint to completion should take no more than 1 or 2 minutes otherwise the paint will become too dry.
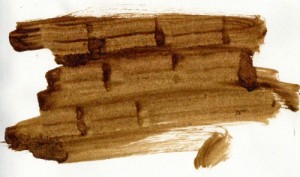
This brick or stone effect was created in a similar manner and using the same materials as for the fence. The difference being in the use of the card. It was scraped in short bursts i.e. in “stone sized” strokes. Areas of untouched paint were left to represent mortar or the fill between the stones.
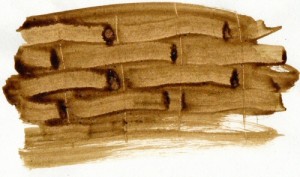 This basket weave or lattice fence effect (dependant upon scale) was created in a similar way to the previous items. The paint was laid down and then vertical lines drawn through the mix using the card edge on. Then using the card on its 15mm width, lines were dragged up to the first lines then stopped then recommenced after and through the next vertical line. At the next level down the card was scraped through the first vertical line but over the next one and so on to create a weave effect
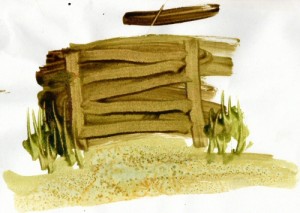
This small painting was completed in less than 4 minutes and shows a fence (created as above method) with plants painted as the previously described “paint pulling” method. After that a brown “watercolour mode” wash was added at the foot of the fence and salt added for textural effect.
Notice the brown strip at the top of the picture that was the test for “acrylic mode” paint mix.
Using Acrylics in “Oil Mode”
Acrylics “oil mode” could be defined as using the paint straight from the tube, or using the absolute minimum amount of water . It might be that if the paint is used direct from the tube that it becomes difficult to work on the paper. It is useful then to add a small amount of washing up liquid to the mix thereby giving a little easing of the paint without significant dilution- i.e. the washing up liquid acts as a lubricant. A few drops may be added to your palette so that you can dip into it as required.
I found it useful to add a little washing up liquid to a dry brush when blending previously applied layers of paint.
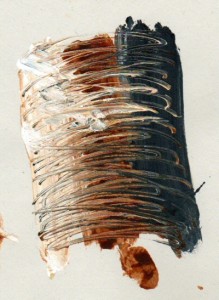
The image here illustrates the use of Acrylics in “oil mode” to create textures that could be for wood, or, if blended more, could be animal fur. Three stripes of “oil mode” paint were laid down on the paper (white, brown and black or Payne’s Grey were used). A cocktail stick was then used to sweep back and forth to drag the different colour paint into the adjacent colour giving a textured effect. If done with the correct colours, stripe width and sufficiently blended, all kinds of effects can be created. Note here that the “sweeping” from side to side with the cocktail stick has been done with and arcing movement so that the impression of a tree’s 3D form is indicated i.e. making it look cylindrical.
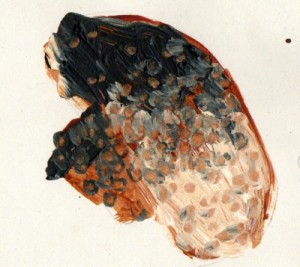
This mushroom painting was created by drawing a very rough shape and then adding three colours painted on it with respect to the light source. Three areas of “oil mode” paint were used (white, brown and black or Payne’s Grey were used).
The basic mushroom shape was created using brown paint then the other two colours added. The white nearest to the light source and the dark colour on the opposite side, where shadow might be anticipated. Then a process of “dotting” with a cotton bud was commenced. This broke through the overlaid colours (i.e. white or black) revealing the brown beneath. This process was also referred to as “pointillism”
This article is just a start on how acrylic paint may be used. You’ll also find lots of excellent artists and tutors who will disagree with the above methods citing things like “the paint will be too thin and transparent…. it wont look good”….and other objections. I would respond in two ways…….
……one, that the artists who showed me this method knew what she was talking about and would have been vociferous in its defence
…..and two, surely it’s the very nature of creativity to “have a go yourself”….. “see what happens if…….”…….to experiment.
Well……. there will be other guidance on the is site regarding acrylics but this is “One persons view”…..and I believe it’s a view worth considering. Have a try and see what you think of these methods. After all, what have you got to lose apart from a bit of time and pennies worth of materials.
Dave Hendry July 2012
