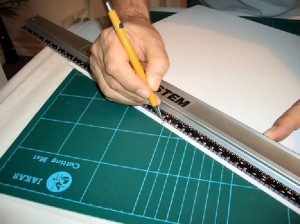
First…… Health and safety. This article deals with the cutting of mount board using various sharp bladed articles…… great care should always be taken with anything sharper than Plasticine as you may lose fingers and not notice it until you say goodbye to your beloved (or even your spouse).
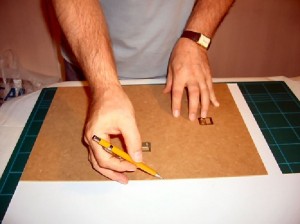 First….. And very important…. Always do any marking out on the reverse side of the mount board ie that side that will not ultimately be seen when viewing the painting. Here you can see me using the backing board from the picture frame as a template to draw around for the outside shape of the mount.
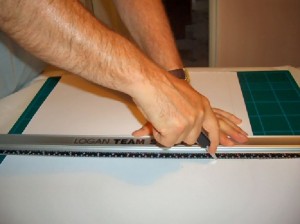 Using a sharp knife* against the mount cutter rule I trimmed up the board to leave me with the outside finished sized mount. The rest of the work will be in cutting the bevelled inner rectangle.
Note that all your cutting should be done on top of a suitable mat as a great carved line in the dining table will make you as popular as a rattle snake in a lucky dip.
Again, using the mount cutter rule, measure the board and find the middle point of both the width and the height. Mark a couple of lines to indicate the two centres.
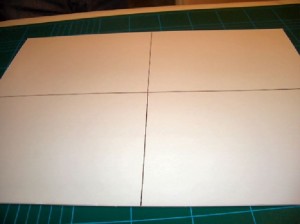 In this image I have shown the two lines….. for the purposes of this guide they are shown much darker than they normally need to be.
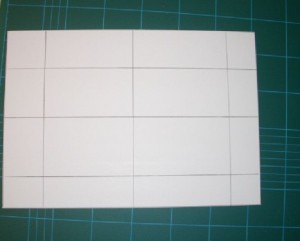 After marking out the centre lines you should then measure the sizes of the painting the mount is to suit. Lets imagine that those sizes are 320mm x 220mm. At this time (using the centrelines as a start point) measure 320 equally about the widest size of the mount. This would mean marking 160mm from each side of the line making a total of 320mm.
Repeat this along the narrow width, marking 110mm each side of the board. These lines are joined up so that a rectangle can be drawn on the board.
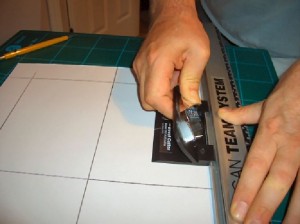
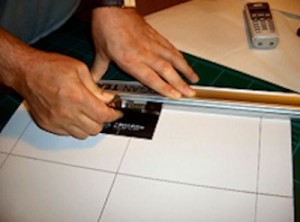 As you can see from the picture to the left, I now have a rectangle drawn on the “wrong” side of the mount board and have applied the mount board cutter to the lip on the rule. Very Important – note that the cutter is sat on what will ultimately be the scrap board that will have been cut out of the mount. Note also that the blade leans away from what will end up as the mount. If this is not done like this then the bevel that we hope to see on the mount will not be as it should.
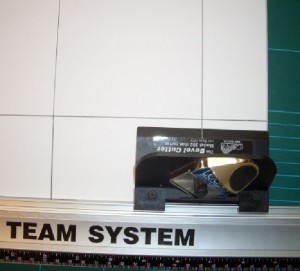 Start by aligning the line on the cutter with one of the marked out lines on the board. This should be done carefully and accurately as you will now start cutting.
When you are ready push the blade through the board using the thumb piece. Important – you must ensure that you cut through the board at your first attempt, as having a second try will leave a ragged edge and the mount may be spoiled. Push the cutter along the rule slowly and firmly until the line on the cutter aligns exactly with the other side of the rectangle.
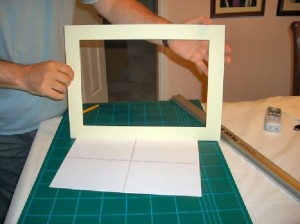 This cutting procedure is repeated for all four sides of the cut-out taking care to start and finish exactly on the marked out lines created earlier. If everything has been done correctly then the centre scrap piece will fall out leaving your mount as shown here (mind you, when I do it I nearly always have to gently coax the scrap out as it is still held in place with small slivers of board….. I never said I was perfect did I)
This is one of those things that always sound complicated when you try to explain it…… like tying shoelaces or putting the toilet seat down (well, I find it confusing) but when you’ve done it once it will seem very easy.
…….. And I can honestly say that I still have most of my fingers………….. Dave Hendry
ps….. Don’t throw the “scrap” rectangle away because, if the original mount was for a large  frame (eg 16″ x 20″) then it may be large enough to cut another mount out of. This will, of course, result in another smaller rectangular piece of “scrap board”. If you end up with rectangular boards that you consider to be too small to cut a mount out of then you can use it to paint on. It would make a decent small acrylic, for example or, if the original mount board were coloured you may wish to try a pastel on it using the colour as your starting background. All this results in making your own mount a very cost effective method, possibly 25% of the cost of ready made ones.
As for a mount cutter…….well I use the “Logan Team System 2000 Mount Cutter (Model 424-1)” which as of January 2012 costs approx £40. Mount board costs approx £3 per sheet, comes in a huge range of colours and, if used to it’s maximum potential (ie as many mounts as possible cut out of it) will result in possibly 6 mounts, depending on their size, and free painting surfaces. Let’s face it……… it’d be just rude not to cut your own.
* Near the start of this process I speak about using a sharp knife to cut the outer blank. My good friend and WAG member Geoff Fielding has made the excellent observation that the angled mount cutter and be used just as well as a knife. Of course he is quite correct and I now use his suggestion as my knife was getting progressively duller as the mount board is quite abrasive but the angled mount cutter blade can easily be replaced when it gets blunt. Nice one Geoff!!
